My blog has moved!

You should be automatically redirected. If not, visit
http://www.micheleguieu.com/wordpress/inspiration/
and update your bookmarks.

Pages

Showing posts with label Teaching Elementary School Students. Show all posts

Wednesday, October 12, 2011

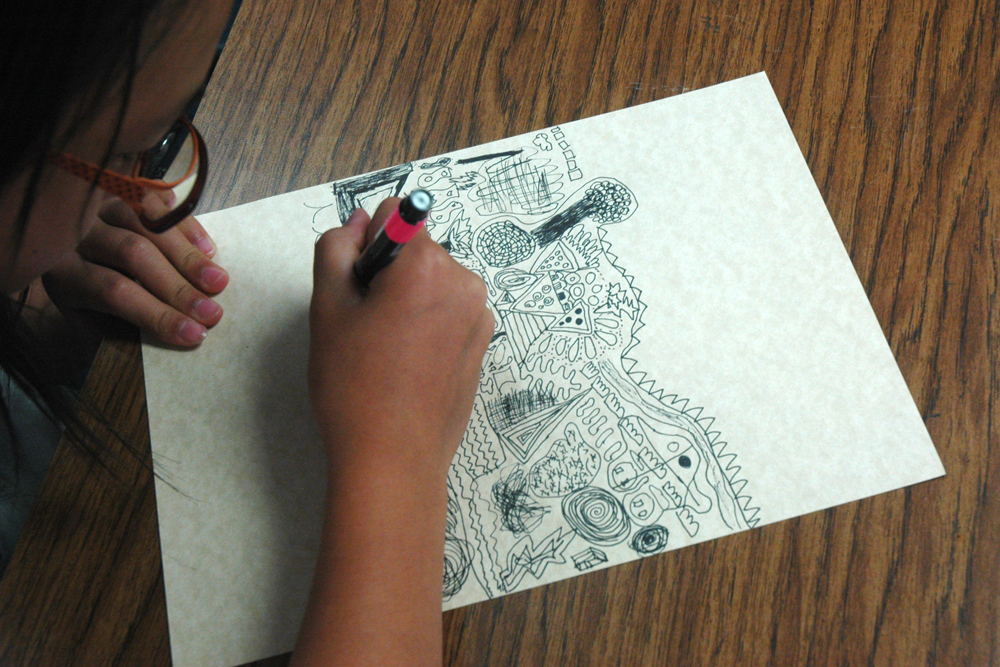
Session 4 with the 5th Graders - Doodling 2


Session 4 - Doodling. Approximately one and a half hours.
Starting with one element. Adding from there by proximity and expanding the drawing.
Tool: a black fine line marker and a fine point Sharpie.

For this second session of doodling we talked about using "representational" elements and about the fact that representational doodles are often either a collection of elements or constitute a story.

To inspire the students, and because doodling is often associated with another activity (listening to music, the radio, giving a phone call), I proposed to them to listen to Steve Jobs' 2005 Stanford Commencement Address.

Steve Jobs' death a few days earlier was the occasion for the teacher to talk with the students about his impact and his legacy.


The commencement speech at Stanford is a powerful speech, maybe not very cheerful but right to the point: "Love what you do - Follow your Heart", through three short stories. Steve Jobs talks about connecting the dots and the circumstances of his birth, then what happened when he was fired by Apple and finally when he was diagnosed with cancer and his close encounter with death. He finished his speech with these famous words: "Stay Hungry, stay foolish".

I thought it could be a wonderful inspiration for the students. But the doodle did not have to include elements of the speech.

They started doodling as the speech started and then we talked about it. When the speech was finished, the students continued doodling listening to the speech a second time.

Along the way, their doodling included more and more "visual" elements from the speech.


Tuesday, October 11, 2011

Session 3 with the 5th Graders - Doodling


Session 3 - Doodling. Approximately one and a half hours.
Starting with one element (preferably somewhere in the center area of the page).
Adding from there by proximity and expanding the drawing.
Tool
: a black fine line marker.

At the beginning of the session, I showed the students a short Power Point presentation with a series of examples of abstract doodling. I want them to feel at ease with the idea of doodling without having to "represent" anything and to try to let go and draw whatever idea comes to their hand. For those who wanted to do otherwise, they could - of course. 

In some cases, the doodles were abstract at the beginning and became representational somewhere along the way: like the ones with the women and their long decorated dresses.


I encouraged the students to do only one doodle during the session, to see where they could go, by adding more and more elements. But if they wanted, they could get another sheet of paper and start another doodle.


Sunday, October 9, 2011

Session 2 with the 5th Graders: Lines


Session 2 - Lines - Three short exercises. Approximately one hour.

1. Zig Zag lines
Building patterns, Varying the thickness of the lines, varying the space between the lines.
Tool: pencil 4B.


2. Using only a repetition of triangles (could have been any other shape)
As many or as few triangles as the student wishes.
Any combination, superposition.
Using empty and blackened triangle.
Varying the thickness of the lines.
Tool: sharpie fine point/marker.


3. Curved lines
Starting with a few lines going from an edge to another.
Varying the thickness of the lines.
Tool: sharpie fine point/marker.


Thursday, October 6, 2011

The Art Notebook / First Session with the 5th Graders


This year I proposed to the two classes I volunteer in (5th grade and 3rd grade) to work on a year-long art project: an art notebook. The idea is to keep everything together and to build a catalog of visual ideas and to work on an art-object
I'd like the students to enjoy the journey and feel comfortable with what we are doing. I presented the project to the parents, with some examples of collages, drawings, doodling, layering, stencils, lettering. I am not looking for a specific result. It is a discovery process. We are trying things. 

I like to browse through the art section at our public library and I came upon a couple of inspirational books about art journals. In The Journal Junkies Workshop by Eric Scott and David Modler, I found an amazing quote: The Journey is the Destination. That's exactly what I'd like the children in the classes this year to experiment: the excitement of the journey itself.

I am very happy and thankful to work with two enthusiastic teachers who love art and who support this adventure!

The parents participated for the material. The Canson Field book is 9x12", 90Lb, hardcover, bound with wide rings and coasts approximately $15 (on sale at my favorites online store, Dick Blick and ASW). I asked $20 per student, which should cover our need in nice pencils, pens and markers, brushes and paint.

We are still waiting for the art pads for the 5th graders. They were back ordered because of the large quantity we needed. Right now the 5th graders work on sheets of paper that they will glue in the art pads as soon as they get them.

First Session - Petroglyphs
I take some time for a short Power Point presentation about the petroglyphs in the Southwest (history, location, description). That same week the teacher talked about the Pueblo civilization. I'd like to sometimes link what we do in art class with subjects the students are learning about. I gathered some images on the internet and some I've taken myself.


One of the slides

"Newspaper Rock" (detail), Utah


We talk about shapes, composition. 
I show photos of some of the engraved walls found in the Four Corners area. 
Then I give them a few sheets printed with black shapes of petroglyphs and some compositions (photos of some of the walls).


I ask the students to take their time and to chose as many - or as few - shapes they want to and to start with a large one and then to organize the space around it.
They work directly with graphite pencils (no erasers), which are super smooth, glide on the paper and make wonderful dark silver greys/blacks.

The idea is to really look at shapes - and those shapes are very special.
I'd like them to "see" the space of the page and organize it as they wish with different elements.
And to take their time, which is not an easy thing to do for the students.


Sunday, June 26, 2011

A CD Face with the 4th Graders


Here are the few photos I have about the work in progress with the 4th graders' class. The duration of the session was slightly shorter than with the 2nd graders. Same material. In the photo above you can see that there was an interesting use of the colored tapes.


One student used the CD perpendicular to the piece of cardboard.


And here's one finished
project.

See:
A CD Face with the 2th Graders for more info about the project

Friday, June 24, 2011

A CD Face with the 2nd Graders


material: a piece of cardboard, scrapes of colored paper
from a previous project, buttons and wiggly eyes,
colored tapes, a used CD, stained craft sticks
and
a sharpie fine point

This is the last project I did with the children at school, with both the 2nd and the 4th graders. With the 4th Graders, it was a day before school ended and I had no time to take pictures of their finished projects. So the photos here are about the 2nd Graders' projects.

This project is not inspired by an art piece like we did previously. It is the occasion to put together different materials and to experience with them.

This was a short session - one hour and a half - but it worked.
I explained to the children that the project was about making a face with a CD (the shinny side) and decorating the background. We talked about what the face could be. They proposed an animal, a self portrait, a friend, a monster, an alien.


I give them some printed circles on white paper to draw on the face before to trace it on the CD, just because we had only one CD per child. But they were not obliged to do it. They could directly trace what they wanted directly on the CD. And some children did.


They could use one, two or all the different materials available.

I told them that most likely, the answer of any of their questions that day would be "Yes!" - because they started to ask questions like: "Can I use ALL the different colored tapes?" "Can I use lots of wiggly eyes?", "Can I brake the wooden sticks and use pieces of them?", "Can I cover the cardboard with tape?"...
"YES!" :)

I enjoyed watching them experiencing with the materials and having a good time!